Saturday, December 19, 2015

Final Project: Rubber Wheels!

LeRon and Professor Bryan helped immensely with this process.
First I printed out thin wheels for the rubber to attach to and stuck them around some old bearings.
Next we hung them on some supports made out of wire.

 Then, dipped them into liquid rubber and set them up to dry. They looked very good (almost good enough to eat! They probably wouldn't have been very tasty though).

After they dried we all spent quite some time cutting them out and pressing them on to the bearings I salvaged from the rollerblades.

Monday, December 14, 2015

Final Project: Bearings

Since each caster wheel requires 3 bearings when bearings are of low supply, I took some roller-skates (provided by Professor Bryan. Christmas came early this year!!) and took the bearings in them! It was pretty fun taking them apart not gonna lie.
The picture is of the skates, wheels, and bearings down at the bottom.

Saturday, December 12, 2015

Final Project: Mk2

My original design wasn't quite big enough for all of the mechanical parts to fit. With the help of LeRon Bridges (http://lbridges2017.blogspot.com/), I scaled up my design. I added parts for the bearings to fit into in place of axles.

Thursday, December 10, 2015

Digital Vehicle: Final!

I designed the wheels and put them on the car (using rollerblade bearings). Once again, Vicente did a fantastic job modeling the chassis. I am happy with how it all turned out!

Tuesday, November 24, 2015

Final Project: Proposal

My idea, inspired by the Group Project, is to make a car with omni directional wheels. The pictures are not the best quality since they are just "screenshots" taken with my phone, but the main idea is there. I need to add more details in the final car, but the chassis is pretty much done. The one problem I was having was getting my car to not look so... well... so suggestive. Which, for this project at least, isn't the goal. I removed the wheel casings and that helped a lot.

First 3D Print!

Brook Simonson (http://bascad.blogspot.com) and I made a little mushroom in Inventor to practice printing on. The whizzing and booping of the 3D printer was mesmerizing to watch to say the least. The bad thing about printing (if you're impatient like me) is that, it not only takes over an hour for something to print, but it isn't always reliable as one would expect. Also, to avoid screw ups in the printing process you should try to avoid too steep of curves.

Attempt 1.
 Attempt 2.
 Attempt 5. Finally, it worked!


Group Car Project: Everything But the Wheels

Vicente Campos (http://coolvincedesigns.blogspot.com/) did an amazing job making the chassis for our car! All that is left to do is make the wheels, print them out, and then assemble.

Thursday, November 5, 2015

Vinyl and Sandblasting!

While cutting out my sheet metal vessel I got a piece of scrap that looked kinda right to be a name tag. I put my name in an illustrator file, and just like magic it was sent to a vinyl cutter (and by magic I mean my professor helped me)! After buffing my piece of scrap, I stuck the vinyl name onto the plate and then blasted the heck out of it with sand. It gave this cool reflective look to the words while leaving the rest non reflective. (the first picture is the vinyl name, the second is the finished product)

Sheet Metal Vessel: Final

Making the final Sheet Metal Vessel was the same process as making the prototype. I taped the blueprints to a piece of sheet metal, cut out the sheetmetal with the print on top, and then folded the sheet where it needed (I also used a grinding tool along the lines to help the folds be sharp and precise). I think it turned out very well, and once again... thank God I didn't do something that I would have been bored with. Projects like these take time and, if you're not invested in the project, be about as fun as sticking your hand into a bunch of scissors (because you get a lot of cuts from the metal in this project).


Sunday, November 1, 2015

Sheet Metal Vessel: Prototype

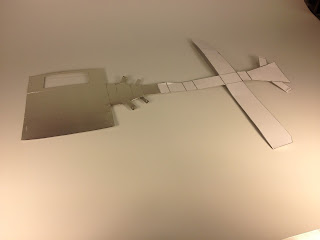
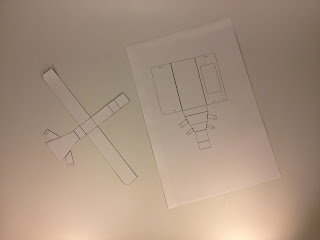
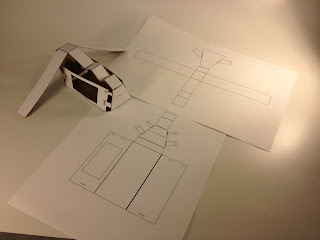
I made a flattened version of the 3D model and printed it on paper, glued it onto card stock, then cut them out. Then I folded using the instructions and put little screws into the designated zones. I think it turned out very well (and it is fun to play with)!


Thursday, October 29, 2015

Sheet Metal Vessel:Almost there...

I added tabs that would strengthen the "door" opening and that I thought looked cool. However, some of the bends (the wings) don't work, and I cannot get a tab to create a bend. I used the "corner seam" tool first, and then tried making a bend, but it didn't work. That is typically how you get a bend to work, and it worked on the other side.

Sheet Metal Vessel: Mirror'd and Door'd

I added a "door" opening in the side and started adding tabs. I was having trouble with my folds so (with the help of Professor Bryan) cut the whole thing in half and mirrored it. Now I have to add tabs where it would look cool!

Tuesday, October 20, 2015

Group Car Project: So far so good!

We just had our first critique during class today and, unfortunately, we couldn't present our car. With that being said, so far I really like what Vincent Campos has done in modeling the chassis (http://coolvincedesigns.blogspot.com/). We still need to add the omni-directional wheels and spoiler, but it is well on its way!

Sunday, October 18, 2015

Sheet Metal Vessel: Well... It's Different

My professor noticed that I wasn't very excited about what I was making and told me to switch ideas. The next idea (a box instead of the flower) wasn't that exciting to me either. Then, he told me just to make something I thought was cool. So I did!! It is a Star Wars troop carrier that can sit on your desk and hold stuff all made out of one folded piece of metal!
This isn't the fully fleshed out version, as it is just made with extrusions rather than actually making everything parts. But, this is the main idea. There will be a door cut out of one side but I am not quite sure how to do that yet with parts. I am very glad I was told just to do my own thing.

Wednesday, October 14, 2015

Sheet Metal Vessel: Prototype in CAD half way there!

I made half of it and I can't remember how to mirror the image. Or at least how to get the mirror button to work.

Thursday, October 8, 2015

Sheet Metal Vessel: Refined Prototype

I chose to continue with the flower I made. It was difficult and rather frustrating folding the cardboard and trying to figure out how the heck I made the flower in the first place. Eventually it happened though!

Sheet Metal Vessel: Prototypes

This was a little difficult just because I'm not used to folding paper in such ways. Also, it was a little tedious. My favorite one was the little flower type thing (second to right on the bottom row).

Paper Construction

Tis a box that I made.


Tuesday, October 6, 2015

Remote Control: Thinkiverse!

http://www.thingiverse.com/thing:1029779 this is how you can 3D print my remote control! I'm not quite sure why you would 3D print a fake remote control... but feel free to do so!

Group Car Project: Brainstorming

My group first decided to all come up with (very rough) ideas for the car. So far we have decided to go with a curved car (such as the last one pictured on the bottom) and add a spoiler with a cool shape to it, such as a triangle.

Tuesday, September 29, 2015

Maker Faire!

I went to the Maker Faire in the State Fair grounds over the weekend. It was really amazing to see everything people have made! I also got to see my idols R2D2 and the robot from Lost in Space.


Tuesday, September 22, 2015

Remote Control: HD Rending


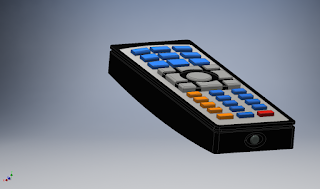
This is the same model just with shadows, reflections, and texture rendering on. I am very happy with the outcome! I never want to see another remote control again at this point though...

Monday, September 21, 2015

Remote Control: Final!

After 100+ Hours (or at least what feels like 100+ hours) it is done. I added some colors even though the selection isn't the best, so its not matched perfectly.I'm just glad making buttons on Inventor is finally over haha


Friday, September 18, 2015

Remote Control: Help!

I got everything I possibly could extruded to the correct height, however half of the buttons are frustratingly not working. They say they have overlapping curves and not open loops. I cannot find them and when I check. It seems like everything is closed off and or not looping. Other than that, things are going well.

Remote Control:Humble Beginnings?

I started by measuring everything I could possibly measure on my object. Then I got all of the geometry down in Inventor.

Monday, September 14, 2015

CAD Practice: Advanced Technical Drawings

In picture number two for some reason it would not rotate/extrude and I could not find the problem. Also, in picture number 4, I couldn't trim the image to be able to become extruded. Other than those I was able to complete the other ones with little to no problems (hopefully).


CAD Practice: Basic Technical Drawings

I had some problems with trimming. It would say that there were dimensions that kept it from being altered. Having said that, I did make them all construction lines and traced over them!